한국어 · English
Workflow Showcase templateis a template app for AI video creators using generation tools such as Seedance 2.0. It uses production references and timeline data from XML exported by Premiere Pro or DaVinci Resolve, or from an experimental CapCut Desktop 9.x project, to place a compact workflow beneath the final rendered video.
Contents: AI customization · Preview · Installation · How to use · Output settings · Setting up references · Troubleshooting · Closing notes
Workflow Showcase works out of the box, and there is no reason to stop there. Change the layout, callouts, aspect ratio, and reference placement to fit your own workflow and taste. The code structure and dedicated customization guides help coding agents such as Codex and Claude quickly find and modify the relevant parts. Make this repository your own Workflow Showcase.
If you give this repository to Codex, Claude, or another coding agent, have it start with these documents instead of searching the code blindly:
The agent should report before touching the Stable core or Red Zone. Do not copy these rules into a prompt by hand; the linked documents are the authoritative versions.
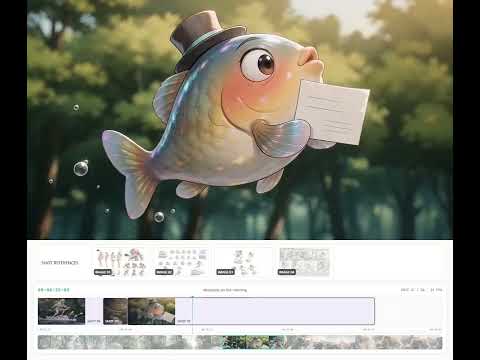
▶ Watch the demo video on YouTube
This is how the app works by default.

The area labeled CLIP A in the center is the user's actual finished video.
Below it, the references used during generation are connected directly to the work done in the editing tool.

By default, only the topmost (PRIMARY) clip among the enabled clips is imported.
You can also output it in a different style like this. Ask your agent to customize it however you like.

Here is an example made from the samples used during development.
Please focus on how the reference/clip interactions change.
The number of final SHOTS matches the number of original video clips used. Splitting one SHOT into multiple edits still counts as one SHOT, while the number of cuts appears as a small EDIT count at the top right of the timeline.

The easiest method: give the URL below to an agent such as Codex or Claude and ask it to install the app.
https://github.com/ch5p/workflow-showcase
If you want to install it yourself, the requirements are:
- Windows 10 / 11
- Node.js 22.12 or later
- FFmpeg (required only for Export)
- NVIDIA GPU recommended (falls back to CPU when unavailable)
git clone https://github.com/ch5p/workflow-showcase
cd workflow-showcase

winget install -e --id Gyan.FFmpeg

npm.cmd ci
npm.cmd start
After that, double-click START_APP.cmd inside the folder whenever you want to launch the app.
On the first launch, you can play the sample Job. Load your own timeline to replace it.
The app opens in Korean or English according to your Windows language. You can switch it with the EN/KR button in the header.
Here is the basic workflow.

- In Premiere, choose Export > Final Cut Pro XML... to export an XML file.
- In DaVinci Resolve, export the timeline as Final Cut Pro 7 XML. This workflow was validated with DaVinci Resolve 21.0.2.
- The app does not currently support effect layers such as Adjustment Layers and automatically excludes them when importing XML. The default UI displays only actual video clips. Exposing effect layers as an
FXlane requires a separate input adapter and UI implementation. - Experimental CapCut input: save the local Windows CapCut Desktop 9.x project, leave that project or close CapCut, then select its project folder from
TIMELINE > CAPCUT PROJECT · EXPERIMENTAL. No XML export is required.
2. Launch the app, then add the TIMELINE and VIDEO separately by drag-and-drop or by clicking their zones.
- Click
TIMELINEand choose XML or the experimental CapCut project input. Loading TIMELINE and VIDEO together is not currently supported. - The finished VIDEO input supports a playable H.264 MP4. MOV/ProRes and M4V are not accepted as final-video inputs. Export an H.264 MP4 with AAC audio from the editor before loading it.

It is easier to begin by adding references that should appear throughout the project to GLOBAL BASE. You can add references with the ADD FILES button as well as drag-and-drop.
More details are provided below.

- Choosing a custom output folder is not supported.
- The current Beta UI outputs at 1280 × 1080 / 60 fps. A 24 fps source video is also exported at 60 fps so the UI
interactionsappear smooth. - The bitrate can be set to 12 or 24 Mbps.
- If an NVIDIA encoder is unavailable, the app falls back to CPU rendering. I do not know how slow that may be on your system.
Share the result on social media or in your community.
The current exporter works as follows.
The app does not first create an intermediate lossy-compressed file and then encode it again.
The current exporter:
- Renders the transparent UI layer in an Electron offscreen window at
1280 × 1080 / 60 fps. - Sends the BGRA UI frames directly to FFmpeg through stdin.
- Lets FFmpeg decode the source video directly and fit it into the
1280 × 720video area, rather than screen-recording Electron video playback. - Composites the transparent UI over that source video and creates a 12 Mbps H.264 file with
h264_nvencby default. - Retries the entire output with
libx264if NVENC is unavailable or fails. - Applies
bt709,yuv420p, and+faststart.
Therefore, the UI canvas receives only one final lossy encode. The source video is decoded directly into the final composite and does not pass through a separate lossy screen-recording file.

TO START: Return to the beginning (0 seconds), identical to the Home key
EDIT PANEL: Identical to the collapsible side button
OUTPUT: Open the output folder (custom folder selection is not implemented)
EXPORT H.264: Render the output

The ↻ button at the top right of the app is Reload Current Job. See Storage and backup.
EN/KR: Switch the UI language
- Spacebar: Play/pause
- Home/End: Move to the first/last SHOT
- Arrow keys: Move between SHOTS
The title callout provides only minimal styles. You can also use your own distinctive watermark.

| LINE | LABEL | MINIMAL |
|---|---|---|
 |
 |
 |

GLOBAL BASE: References registered here appear in every SHOT. (Global references)
REFERENCE 3D POP: This project-wide switch sits below GLOBAL BASE. Leave it off for the original flat staggered entrance, or turn it on for the 3D pop entrance. The selected motion is used by both the preview and Export, including references shown early by LEAD-IN.

- ADD: Add these references beside GLOBAL BASE (default).
- REPLACE: Ignore GLOBAL BASE and show only these references.
- HIDE: Hide references during this SHOT.
- LEAD-IN: Fixed at 1 second with no built-in option. Ask your agent if you want to change it.
LEAD-IN places a reference on the neighboring SHOT one second early when the scene using that reference is too short to register clearly.

If the imported timeline and finished video differ in length by at least one frame, a DURATION Δ badge appears at the top left of the paused video. Its source label is XML or CAPCUT.
This is especially likely after an In/Out export because the XML may include the final Out frame.
(You can ignore it. It does not appear during playback or in the rendered output.)

This Premiere example means that the XML endpoint is 45.79 seconds while the actual video is 48.79 seconds. The exported result will stop at 45.79 seconds, following the imported timeline. If your video ends at 10 seconds but you want to leave one second of breathing room, extend the Premiere timeline to the desired endpoint with a Color Matte before exporting the XML. For CapCut, change and save the project duration, then reload its timeline.


This dialog appears when an XML already exists and you load another XML. CapCut shows the equivalent UPDATE TIMELINE action.
Use UPDATE XML when the finished video has gained a SHOT, a SHOT has become shorter or longer, or you need another final_final_really-final.mp4-style update. It preserves the video, references, GLOBAL, title, callout, and output settings, then safely reconnects existing SHOT mappings to the new timeline.
Use NEW JOB after finishing one project and moving on to a different one. It resets the existing timeline input, video, references, mappings, title, and callout, but preserves rendered Export files, logs, UI language, and output settings.
CANCEL closes the dialog without changing anything.
The app operates a single current-job folder. New information replaces the current work and is not automatically stored in a separate Job slot.

A small BACKUP JOB button appears at the bottom of the EDIT PANEL. It copies job.json, the registered timeline input, references, and hash information to the backup folder. Source video, Export files, and logs are not included, so keep the MP4 used by the Job separately for restoration. You can also quit the app completely and preserve a copy of the entire current-job folder.
Export says FFmpeg is missing
→ Run winget install -e --id Gyan.FFmpeg, then completely quit and reopen the app. If WinGet is unavailable, place ffmpeg.exe in the app folder's ffmpeg directory.
My video is rejected when I add it → If the app cannot play its codec, it blocks the replacement before changing the existing Job. Export it again as MP4 (H.264) and try loading that file.
The video plays, but Export reports an audio error → Source audio is copied without transcoding, and only AAC has been validated. If Export fails, create an H.264 MP4 with AAC audio and load that version.
The rendered result is shorter than expected → See DURATION Δ above. The app renders only the imported timeline duration.
I launched the app, but no window appeared → Check whether another instance is already running. A second launch brings the existing window forward and then exits quietly to protect the Job data.
Something is wrong, but I do not know why
→ Everything is recorded in current-job/logs/app.log. Ask an agent to follow the Troubleshooting Contract, read the recent event sequence, and tell you what failed before changing code.
- The stable input is Final Cut Pro 7 XML (
xmeml). XML exported by Adobe Premiere Pro and DaVinci Resolve 21.0.2 has been validated in the app. VEGAS Pro can export Final Cut Pro 7/DaVinci Resolve XML and may also work, but it has not been fixture-tested. Windows CapCut Desktop 9.x local projects are available as an experimental input; the raw draft and absolute media paths are not stored. Modern Final Cut Pro.fcpxmlis not currently supported and requires a separate adapter that follows the Input Adapter Contract. - The output resolution is
1280 x 1080, which is reasonably viewable on a phone. - I hope people who, like me, cannot be bothered to build an entire workflow presentation but still want to show that some work went into the process will take this and use it in different ways. I paid attention to making it easy to customize, so put your agent to work and tailor it to your taste.
- I do not have a programming background, so I picked the strongest model I could and asked it to make sure that when a user types [do it] once, an agent can quickly locate and modify only that part. During the public-release refactor, the stable core was separated from the presentation areas intended for free customization. I expect modifications to be approachable.
Tested in the following environment:
- Windows 11
- Adobe Premiere 2026 (26.2.2 Build 3)
- DaVinci Resolve 21.0.2 Final Cut Pro 7 XML
Additional compatibility notes:
- This beta application is Windows-only; macOS execution is not supported.
- VEGAS Pro Final Cut Pro 7/DaVinci Resolve XML is a likely compatible input but has not been validated with a real project.
- Modern Final Cut Pro XML (
.fcpxml) is not supported. A separate input adapter must be created under the Input Adapter Contract. Ask your agent if needed.
The installation includes AI customization guides. Tell your agent what you want to change, and the documents are organized so it can trace the relevant area quickly. Just give the instruction.