We are here to broaden your exposure to Computer Science. We can only achieve that purpose when you work hard and honestly. It may be tempting to copy-paste code from a classmate, or let a classmate do all your work for you—don't! You will be cheating yourself from the most valuable thing course has to offer—overcoming challenges.
We know that hard, and honest work doesn't come easily. If you feel like you are falling behind:
- Don't copy-paste code, or let someone do your work for you
- Ask for help!
- Tell the teaching-team you need more time
- Open the assignment link your teacher posts in Teams or OneNote, and accept the assignment. GitHub will create a private project just for you.
- On your new project page, click the green Code button, copy the link, and clone the project into IntelliJ (File → New → Project from Version Control, then paste the link).
- When IntelliJ asks if you trust the project, say yes / trust it so it can finish setting things up.
- If IntelliJ asks you to pick a Java version (JDK), choose 17 or newer.
- Use the green play dropdown near the top-right of IntelliJ. You should see
MainandUnitTests. You can stay in the file you are editing — you do not need to open a different file first.
If anything looks confusing the first time you open the project, ask a teacher — IntelliJ asks a few one-time setup questions, and then day-to-day work is just writing code and using that green play button.
There are various ways to represent visual images in digital format. One easy way to represent images is via a 2-D array where each grid represents a color:
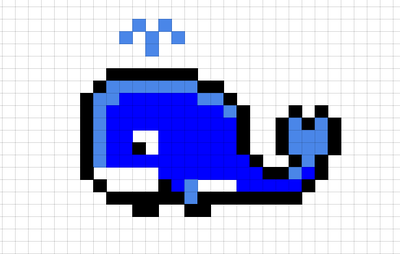
The color space in each element of the array can be represented as either RGB or HSL.
RGB is a way of representing colors by constructing them from various intensities of red, green, and blue light. They are most often represented in programming as a tuple:
( red: 145, green: 198, blue: 54 )
The intensity of each component color is a value between 0 and 255.
HSL is an alternate way of representing a color space by describing it's hue, saturation, and lightness, similar to how a color wheel represents colors. Like RGB, it can also be represented as a tuple:
( hue: 285, sat: 0.36, lightness: 0.87 )
Unlike RGB, each component is represented differently:
- Hue: a value between 0 and 360
- Saturation: a value between 0 and 1
- Lightness: a value between 0 and 1
The Wikipedia links above contain much more information about each of these color spaces but for this assignment, these basics should suffice.
In this project, you will be implementing functionality to manipulate images in various ways.
The program allows you to run several commands that allows you to manipulate images; see below for more detailed information about each of these image manipulations. Here are the commands that the program allows you to run:
- load and save: When you run the program, you will need to call load with the file you wish the manipulate and save after you manipulate the image.
- quit: has also been implemented for you.
- grayscale: will take the loaded image and convert it to grayscale.
- invert: will invert each pixel of the image.
- sepia: will take the loaded image and convert it to sepia.
- bw: will take the loaded image and convert it to black and white.
- rotate: will rotate the image 90 degrees clockwise.
- instagram: will apply a halo and grain effect ala Instagram.
- hue, saturation, and lightness will adjust the hue, saturation, and lightness of the image.
These are the functions you will implement:
-
In RGB.java:
- RGB: There are two constructors that need to be implemented. Details are in the comments above the methods and should be self explanatory.
- (Get|Set)(Red|Green|Blue): Gettors and settors for the member variables need to be implemented.
-
In HSL.java:
- HSL: Just one constructor to implement.
- (Get|Set)(Hue|Saturation|Lightness): Gettors and settors for the member variables need to be implemented.
-
In ImageManipulator.java (the comments above each method explain what needs to be done and the unit tests can be used to verify):
- Load (hint: the Img class provides mechanisms to load and save, use those rather than trying to come up with special logic)
- Save
- ConvertToGrayScale
- InvertImage
- ConvertToSepia
- ConvertToBW
- RotateImage
- InstagramFilter (hardest: warm filter + blend with
resources/halo.pngandresources/decorative_grain.png. Overlay size may differ from your photo.) - SetHue
- SetSaturation
- SetLightness
Start off by implementing all the RGB methods (including clamping in the constructor) as nothing else will work until this is done. Then we suggest starting with the earlier ImageManipulator methods and saving InstagramFilter for last. Implement all HSL methods before SetHue / SetSaturation / SetLightness.
When you run Main or UnitTests from IntelliJ, the working directory is the project root — use paths like resources/halo.png, not absolute paths on your computer.
At the end of every class period, commit and push your work from IntelliJ:
- Click Git > Commit… (or use the Commit tool window).
- Review the changed files. You can double-click a file to see the diff.
- Enter a short commit message, then choose Commit and Push….
- Confirm the push to your project's
mainbranch. - On GitHub, confirm your latest commits are visible.
Pushing to main is how you turn in work for this assignment. Autograding runs on those pushes. You can keep improving and pushing after the deadline if your teacher allows late work — ask about any late penalty.
Your grade for each project will fall into one of four categories:
| Grade Level | Explanation |
|---|---|
| Exceeds Expectations |
|
| Excellent |
|
| Satisfactory |
|
| Needs Improvement |
|